Java Tutorial: Setting up Java, Maven, and eclipse
This is mainly for the beginners of Java to get familiarized with Java, Maven, and eclipse. This will also be handy for starting on your self-taught Java projects.
Install and configure Java
Step 1: Download and install Java 6 or later version if available by googling "Java downloads". Make sure that you download and install the right version for the operating system on which you will be running -- for example Windows (32 bit or 64 bit), Linux, Solaris, MAC, etc. You will need both the JDK and the JRE.

The javac is the compiler that converts a source file (e.g. HelloWorld.java) to a byte code file (e.g. HelloWorld.class). The java is the run-time command to execute a program (i.e. java HelloWorld). The src.zip is where all the library files are located and rt.jar is where the run-time class files are located.
Step 2: Set the environment variables. In a command prompt, if you type "set" (in WIN 32) and "env" (in Unix), it will show all the environment variables. You need to set the JAVA_HOME environment variable. In DOS it is %JAVA_HOME% and in a Unix system, it is $JAVA_HOME. You also need to add %JAVA_HOME%/bin to the "path" environment variable. you can verify if Java is set up correctly by typing the following command in a command prompt.

If the version is not displayed, then Java is not set up correctly.
Install and configure Maven
Maven is a build and deployment tool.
Step 1: Download and install Maven from http://maven.apache.org/download.html.
Step 2: Configure the environment variables "M2_HOME" and "path". Use M2_HOME instead of M3_HOME as eclipse might not work well with M3_HOME. For example
SET USERPROFILE=%TOOLS_HOME%home
SET JAVA_HOME=%TOOLS_HOME%java\jdk-1.6.0_25

SET M2_HOME=%TOOLS_HOME%maven\apache-maven-3.0.3

SET MAVEN_OPTS=-Xmx512m -XX:MaxPermSize=256m -Duser.home=%USERPROFILE%
Once maven has been set up correctly, you should be able to verify it by

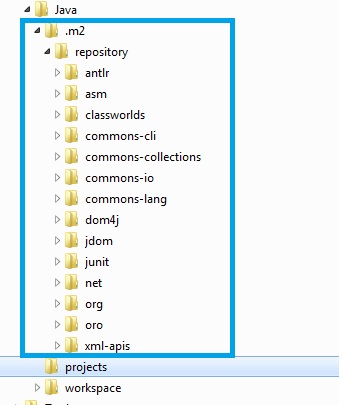
You can set up the repository location by opening the settings.xml file under conf folder inside your maven installation directory. Repository is where the dependency Java libraries will be stored.
<localRepository>c:\tools\home\.m2\repository</localRepository>
If your internet access requires proxy settings, you need have that added to your settings.xml file.
<proxy>

  <id>optional</id>

  <active>true</active>

  <protocol>http</protocol>

  <username>proxyuser</username>

  <password>proxypass</password>

  <host>webproxy</host>

  <port>8080</port>

  <nonProxyHosts>local.net,some.host.com</nonProxyHosts>

</proxy>
Install and configure eclipse.
Step 1: Download and install eclipse latest version from http://www.eclipse.org/downloads/. It is an IDE (i.e. Integrated Development Environment). Get the EE (Enterprise Edition).
Step 2: It is a good practice to keep your eclipse work space separate from where your tutorials or projects are stored. This will not tie up your projects or tutorials with an IDE. What if you want to use your projects or tutorials with NetBeans? For example

Here is a simple step by step guide in setting up Maven and eclipse
Step 1: The settings.xml file under %M2_HOME%/conf is where you can set up your local repository location, central repository server from where you can download the relevant artifacts, proxy server settings to access internet, etc as shown below.
<?xml version="1.0" encoding="UTF-8"?>

<settings xmlns="http://maven.apache.org/SETTINGS/1.0.0"
          xmlns:xsi="http://www.w3.org/2001/XMLSchema-instance"
          xsi:schemaLocation="http://maven.apache.org/SETTINGS/1.0.0 http://maven.apache.org/xsd/settings-1.0.0.xsd">

  <localRepository>c:\temp\java\.m2\repository</localRepository>

  <proxies>
    <proxy>
   <id>genproxy</id>
      <active>true</active>
      <protocol>http</protocol>
      <username>username</username>
      <password>passwd</password>
      <host>proxy-server</host>
      <port>8080</port>
      <nonProxyHosts>localhost</nonProxyHosts>
    </proxy>

  </proxies>


</settings>
You can browse the repository by going to http://search.maven.org where you can search for artifacts and relevant version numbers. You can even manually download artifacts.
Need to add the following snippets to the root element of your settings.xml file to tell where to download the jar files from.
<profiles>
    <profile>
      <id>JDK</id>
      <activation>
        <property>
          <name>JDK</name>
        </property>
      </activation>
      <properties>
        <JDK_1_5>c:\tools\java\jdk-1.5.0_06</JDK_1_5>
        <JDK_1_6>c:\tools\java\jdk-1.6.0_11</JDK_1_6>
      </properties>

    </profile>

 <profile>
  <id>nexus</id>
  <activation>
   <activeByDefault>true</activeByDefault>
  </activation>
  <!--Enable snapshots for the built in central repo to direct -->
  <!--all requests to nexus via the mirror -->
  <repositories>
   <repository>
    <id>central</id>
    <url>http://search.maven.org/</url>
    <releases><enabled>true</enabled></releases>
    <snapshots><enabled>true</enabled></snapshots>
   </repository>
  </repositories>
  <pluginRepositories>
   <pluginRepository>
    <id>central</id>
    <url>http://search.maven.org/</url>
    <releases><enabled>true</enabled></releases>
    <snapshots><enabled>false</enabled></snapshots>
   </pluginRepository>
  </pluginRepositories>
 </profile>
</profiles>
Note: Drill down by groupid that specify in your pom.xml file under dependencies.
Step 2: Generate the pom structure with the following maven command.
C:\Temp\Java\projects>mvn archetype:generate -DgroupId=com.mytutorial -DartifactId=simpleNote: Make sure that you already don't have a folder "simple" under projects. Accept the default settings when prompted by pressing enter. Now, if you inspect the file structure, it will look like.

Carefully, inspect the folders and files that maven has created. The local repository will also have a number of jar files for project dependencies like junit.jar and maven plugin jars.
This maven project can be imported into eclipse.
Step 3: create an eclipse short cut as shown below to open eclipse with your workspace "my-tutorials"
C:\Tools\eclipse\eclipse-3.7-SR2-win32-x86_64\eclipse.exe -data C:\Temp\Java\workspace\my-tutorials
Step 4: Close the welcome splash screen, and tell eclipse with the help of the m2e (i.e maven to eclipse) plugin where your maven settings.xml file is residing. This is done by selecting from the eclipse main menu Window --> Preferences --> Maven (note: you can also search at the top in the Preferences dialogue). As you can see below, it will also display your repository location as highlighted in blue.

Now, you can refresh your projects or select the project "simple" and then right-mouse-click to bring up the contextual menu, and then select "Maven --> Update Dependencies" to see the packages your project depends on. In this example, it is junit-xxx.jar.

You can also check you build path by right-mouse-clicking on the simple project and then selecting Build Path --> Configure Build Path
Step 5: Import the maven project you had just created. Select File --> Import and then

Click Next,

Step 6: Now, you can see the "App.java" Java source file as shown below. This was created by Maven.

Also inspect the pom.xml file which is used for packaging up your artifacts. The junit.jar is required for writing unit tests. You can also notice AppTest.java under src/test/java

Step 7: You can run the class by "right-clicking" on App.java to bring up the contextual menu and then selecting "Run As" and then "Java Application", which prints the output "Hello World" in the console tab window.
Step 8: You can now package it as a jar file by running the mvn command on a command prompt. The pom file says the packaging type is "jar". Currently the target folder is empty, and once you package it, it will have the packaged artifacts.
Firstly, locate the folder where the pom.xml file is and then execute the mvn command.

The command is "mvn clean package". if you refresh the "target" folder by selecting it and pressing F5 or by selecting it and then right-mouse-clicking and then selecting "Refresh" you will see the artifacts that are generated. If you don't want the junit tests to be run, you can add -Dmaven.test.skip to the above command.


Step 9: Finally, you can run the jar file from a command prompt.The classpath tells where to find the App.class file.
java -classpath C:\Temp\Java\.m2\repository\com\mytutorial\simple\1.0-SNAPSHOT\simple-1.0-SNAPSHOT.jar com.mytutorial.App
That's it. You now have Java, Maven (build tool), and eclipse (IDE) working with each other. If you liked this give me your feedback and stay tuned for more tutorials.
Note: If you want to generate the eclipse related artifacts outside eclipse from a command-line, you can issue the following command mvn eclipse:clean eclipse:eclipse. Similar commands are available for other IDEs as well.
You may also like
- Build tools (Maven and Ant) interview questions and answers
- Maven interview questions and answers - inheritance vs aggregation
- Java Tutorial: Setting up Java, Maven, and eclipse
Labels: Eclipse Tutorial, Java Tutorial, Maven Tutorial
posted by Unknown at
9/21/2012 02:54:00 PM
![]()
![]()

9 Comments:
Nice Example
good one
This comment has been removed by a blog administrator.
Thanks for your grateful informations, this blogs will be really help for us.....
love the tutorial...much appreciated
This comment has been removed by a blog administrator.
Amazing Java tutorial
Great post.
Nice Post
Post a Comment
Subscribe to Post Comments [Atom]
<< Home