JSF Tutorial: Using JSF 2.0, eclipse, and maven
This tutorial is an extension to the previous simple web tutorial . In this tutorial, JSF is used to create a simple greeting web application to run on the Tomcat server. It also demonstrates how Maven brings in the relevant dependent JAR files.
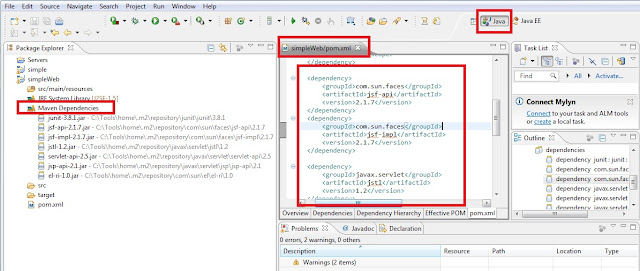
Step 1: Firstly, you need to bring in the relevant dependency JSF jar files like jsf-api-2.1.3.jar, jsf-impl-2.1.3.jar, el-ri-1.0.jar, jsf-facelets-1.1.14.jar (brought it in transitively), jsp-api-2.1.jar, and so on. This where maven comes in handy and all you have to do is modify the pom.xml that you created in the previous simple web tutorial to have the relevant dependencies added as shown below.
<project xmlns="http://maven.apache.org/POM/4.0.0" xmlns:xsi="http://www.w3.org/2001/XMLSchema-instance"
 xsi:schemaLocation="http://maven.apache.org/POM/4.0.0 http://maven.apache.org/maven-v4_0_0.xsd">
 <modelVersion>4.0.0</modelVersion>
 <groupId>com.mytutorial</groupId>
 <artifactId>simpleWeb</artifactId>
 <packaging>war</packaging>
 <version>1.0-SNAPSHOT</version>
 <name>simpleWeb Maven Webapp</name>
 <url>http://maven.apache.org</url>

 <dependencies>

  <dependency>
   <groupId>junit</groupId>
   <artifactId>junit</artifactId>
   <version>3.8.1</version>
   <scope>test</scope>
  </dependency>

  <dependency>
   <groupId>com.sun.faces</groupId>
   <artifactId>jsf-api</artifactId>
   <version>2.1.7</version>
  </dependency>
  <dependency>
   <groupId>com.sun.faces</groupId>
   <artifactId>jsf-impl</artifactId>
   <version>2.1.7</version>
  </dependency>

  <dependency>
   <groupId>javax.servlet</groupId>
   <artifactId>jstl</artifactId>
   <version>1.2</version>
  </dependency>

  <dependency>
   <groupId>javax.servlet</groupId>
   <artifactId>servlet-api</artifactId>
   <version>2.5</version>
  </dependency>

  <dependency>
   <groupId>javax.servlet.jsp</groupId>
   <artifactId>jsp-api</artifactId>
   <version>2.1</version>
  </dependency>
  <!-- Tomcat 6 need this -->
  <dependency>
   <groupId>com.sun.el</groupId>
   <artifactId>el-ri</artifactId>
   <version>1.0</version>
  </dependency>

 </dependencies>
 <build>
  <finalName>simpleWeb</finalName>
 </build>
</project>
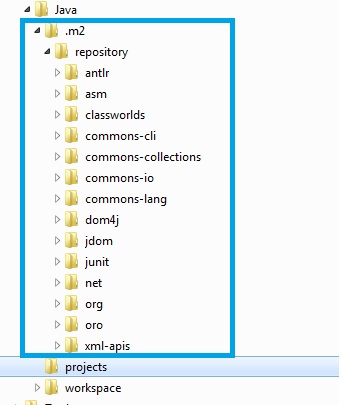
Step 2: Once you have updated the pom.xml file, you can right-mouse-click on the simpleWeb project to bring up the context menu, and then select Maven --> Update Dependencies, which should now update your dependencies with additional jar files by downloading it from the external maven repository. You can view the files 2 ways.
Option 1: Change your perspective to Java perspective from the JEE perspective, by selecting Window --> Open Perspective --> Java from the top (or main) menu. Once you are in that perspective, you can view the dependency jar files as shown below.
Option 2: You can right-mouse-click on the simpleWeb project to bring up the contextual menu, and then select Properties and then Java Build Path on the modal pop up menu, and on the RHS dialogue you can see the maven dependency jar files as shown below.
Step 3: You need to create new folders (java and resources) and a package (com.mytutorial) under simpleWeb/src/main folder. Right-mouse-click on "main" folder under which you want to create a new folder, and the select New --> Folder and name the folder as java in the Folder name input box. Do the same for the resources folder under the main folder if it does not already exist.
Step 4: Now, add these newly added folder(s) to your build path by right-mouse-clicking on simpleWeb folder and then selecting Build Path --> Use as Source Folder. You can view if it has been properly added by right-mouse-clicking on simpleWeb, and then selecting Properties and then Build Path on the modal pop up menu
The src/main/java is for the java source files and the src/main/resources is for .properties files like messages.properties.
Step 5: You can now add the com.mytutorial package under both src/main/java and src/main/resources folders. Right-mouse-click on the relevant folders (src/main/java and src/main/resources) and then select New --> Package and then type "com.mytutorial" under the "Name" input box.
Step 6: Create the messages.properties file under sr/main/resources folder and package com.mytutorial by right-mouse-clicking on mytutorial and then selecting New --> File and then typing in messages.properties in the "File name" input box. Enter the following file contents
inputname_header=JSF Tutorial
prompt=Tell me your name:
greeting_text=Welcome to JSF
button_text=Hello
sign=!
Note: it is a best practice to externalize the messages, button labels, etc as shown above with messages.properties.
Step 7: Create a JSF managed bean under src/main/java folder and package com.mytutorial. You do this by right-mouse.clicking on com.mytutorial and then selecting New --> Class. Enter "PersonBean" in the "Name" input box. Fill in the contents as shown below
package com.mytutorial;

import javax.faces.bean.ManagedBean;
import javax.faces.bean.SessionScoped;

@ManagedBean
@SessionScoped
public class PersonBean {

 private String name;

 public String getName() {
  return name;
 }

 public void setName(String name) {
  this.name = name;
 }

}
Tip: type the private String name; and then right-mouse-click on the "name" and then select Source --> Generate Getters and Setters, to generate the appropriate getter and setter methods by ticking the appropriate check boxes in the pop up modal panel.
Note: In JSF 1.x, you had to declare this beans in the faces-config.xml, but this is no longer required in JSF 2.0. Power of annotations to simplify things.
Step 8: Next step is to create the relevant xhtml pages. The greeting.xhtml will display a input box to capture a name from a user and a button "greeting", when clicked will forward a another page welcome.xhtml to greet the person with name.
So, greeting.xhtml --> welcome.xhtml
Create the pages by right clicking on webapp under src/main and create two new files by right-mouse-clicking and then selection New ---> File. Enter the "File name" as greeting.xhtml and the other one as welcome.xhtml.
Step 9: Fill in the file contents as shown below and then save the files.
greeting.xhtml
<?xml version="1.0" encoding="UTF-8"?>
<!DOCTYPE html PUBLIC "-//W3C//DTD XHTML 1.0 Transitional//EN"
"http://www.w3.org/TR/xhtml1/DTD/xhtml1-transitional.dtd">

<html xmlns="http://www.w3.org/1999/xhtml"
      xmlns:f="http://java.sun.com/jsf/core"
      xmlns:h="http://java.sun.com/jsf/html">

    <f:loadBundle basename="com.mytutorial.messages" var="msg" />

    <h:head>
        <title>JSF 2.0 Greeting</title>
    </h:head>
    <h:body>
     <h3>JSF 2.0 Hello World Example - greeting.xhtml</h3>
     <h:form>
        <h:inputText value="#{personBean.name}"></h:inputText>
        <h:commandButton value="greeting" action="welcome"></h:commandButton>
     </h:form>
    </h:body>
</html>
Normally you would need faces-config.xml to define your navigation rule and define the method in the backing managed bean. Since, this is a simple tutorial, the action="welcome" will navigate to welcome.xhtml page and since the PersonBean is defined in the session scope, it will be in scope for the welcome.xhtml to pull out the "personBean.name".
welcome.xhtml
<?xml version="1.0" encoding="UTF-8"?>
<!DOCTYPE html PUBLIC "-//W3C//DTD XHTML 1.0 Transitional//EN"
"http://www.w3.org/TR/xhtml1/DTD/xhtml1-transitional.dtd">

<html xmlns="http://www.w3.org/1999/xhtml"
      xmlns:f="http://java.sun.com/jsf/core"
      xmlns:h="http://java.sun.com/jsf/html">

 <f:loadBundle basename="com.mytutorial.messages" var="msg" />

    <h:head>
     <title>JSF 2.0 Hello World</title>
    </h:head>
    <h:body bgcolor="white">
     <h3>JSF 2.0 greeting - welcome.xhtml</h3>
     <h4><h:outputText value="#{msg.greeting_text}" />
      #{personBean.name}
  <h:outputText value="#{msg.sign}" /></h4>
    </h:body>
</html>
Step 10: This step is to wire up JSF via the web.xml file which is found under src/main/webapp/WEB-INF.
<?xml version="1.0" encoding="UTF-8"?>
<web-app xmlns:xsi="http://www.w3.org/2001/XMLSchema-instance"
 xmlns="http://java.sun.com/xml/ns/javaee" xmlns:web="http://java.sun.com/xml/ns/javaee/web-app_2_5.xsd"
 xsi:schemaLocation="http://java.sun.com/xml/ns/javaee http://java.sun.com/xml/ns/javaee/web-app_2_5.xsd"
 id="WebApp_ID" version="2.5">

 <display-name>JSF Application</display-name>

 <!-- Change to "Production" when you are ready to deploy -->
 <context-param>
  <param-name>javax.faces.PROJECT_STAGE</param-name>
  <param-value>Development</param-value>
 </context-param>

 <!-- JSF mapping -->
 <servlet>
  <servlet-name>Faces Servlet</servlet-name>
  <servlet-class>javax.faces.webapp.FacesServlet</servlet-class>
  <load-on-startup>1</load-on-startup>
 </servlet>

 <!-- Map these files with JSF -->
 <servlet-mapping>
  <servlet-name>Faces Servlet</servlet-name>
  <url-pattern>/faces/*</url-pattern>
 </servlet-mapping>
 <servlet-mapping>
  <servlet-name>Faces Servlet</servlet-name>
  <url-pattern>*.jsf</url-pattern>
 </servlet-mapping>
 <servlet-mapping>
  <servlet-name>Faces Servlet</servlet-name>
  <url-pattern>*.faces</url-pattern>
 </servlet-mapping>
 <servlet-mapping>
  <servlet-name>Faces Servlet</servlet-name>
  <url-pattern>*.xhtml</url-pattern>
 </servlet-mapping>


</web-app>
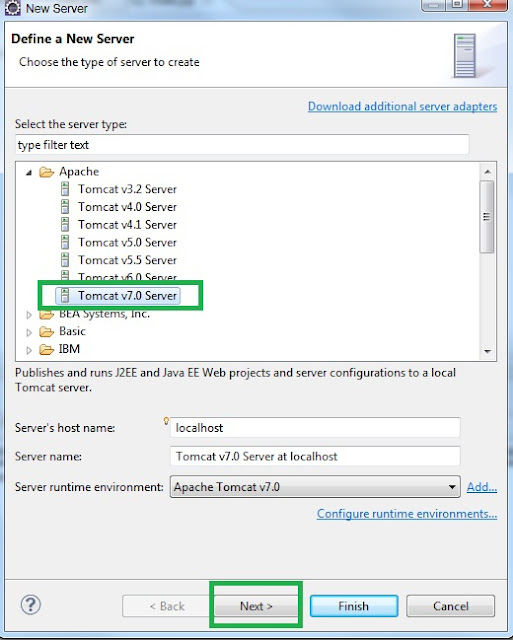
STEP 11: You can now publish the simpleWeb application within eclipse and start the Tomcat server as you did in the previous simpleWeb tutorial without JSF.
STEP 12: You can now type the following URL to start the application in browser of your choice.
- http://localhost:8080/simpleWeb/greeting.jsf
- http://localhost:8080/simpleWeb/greeting.xhtml
- http://localhost:8080/simpleWeb/greeting.faces
- http://localhost:8080/simpleWeb/faces/greeting.xhtml
STEP 13: You will get the following browser screen. Type in your name, and click on the "greeting" button.
You will get the welcome.xhtml page as shown below. the URL will still stay the same as this is a page "forward". If you want the URL to change, then you need to do a "sendredirect" by defining the navigation rule in the faces-config.xml.
So, you not only have learnt to create a simple JSF page, but also how to use eclipse IDE and Maven. See, now if you can build the war outside eclipse using the "mvn eclipse install" and deploy it to the Tomcat outside eclipse. The built file will be stored in the "target" folder.
Labels: JSF Tutorial


